Two-Ingredient Caramel

Car-mel. Care-ah-mel. Tomayto. Tomahto.

Whichever way you say it, I have always loved caramel. I loved Werther’s caramel candies as a kid (they contributed to all the cavities I got growing up). Then as an adult, I discovered that the main ingredients in a Werther’s are high fructose corn syrup, palm oil (not sustainably sourced), and artificial flavors. I’m not surprised but nevertheless disappointed. Could I find a “healthier” alternative for caramel? The fake stuff isn’t great. The real stuff is…made out of melted cream and sugar. Not great either.

I had a revelation the other day. Maple syrup + cashew butter = a caramel fix. Sure, it’ll never taste as delectable as the real thing. When you really want caramel, eat the mouth-watering buttery, overly sugary classic caramel. But because I crave caramel everyday, I go with this more sustainable take.

Ingredients

  • 1/2 cup of smooth cashew butter

  • 1 teaspoon of maple syrup

If you want to kick it up a notch, you can add any or all of the following:

  • A pinch of salt

  • 1/2 teaspoon of vanilla extract or ground vanilla

  • Powdered freeze-dried strawberries

  • Make it taste like Nutella by using hazelnut butter instead and add a teaspoon of cocoa powder

I love this carmelly nut butter with apples, in yogurt, or as “frosting”.

The New Hummus

Dare I say it, this dip is tastier and easier than making hummus. Goodbye, soaking chickpeas for hours. Goodbye, blending them until smooth. Hello, eggplant.

Ingredients

  • 1 American or Globe eggplant (the large, purple kind we usually see at the store)

  • 1/2 cup of tahini

  • Juice of one lemon

  • 6 cloves of fresh garlic, minced

  • 1 teaspoon paprika or to taste

  • 1 teaspoon harissa seasoning or to taste

  • Salt and pepper to taste

Instructions

  1. Steam the eggplant until soft.

  2. Add all the ingredients into a large mixing bowl.

  3. Using a fork, mash the eggplant and mix everything together.

  4. Enjoy warm or cold with crackers, carrots, or on top of…anything :)

Options

  • Steam eggplant and zucchini

  • Add curry powder

  • Add chili sauce as garnish

Going Brothless

I used to think that a good soup needed good broth and I’m learning that that’s just not the case. While pre-made broth (whether store-bought or homemade) will always be a delicious base for a soup, I’ve grown tired of its requirement.

I’m not thrilled about the plastic cartons of broth at the store or the bouillon cubes made with preservatives. I don’t have the fridge space, the containers, or the time to make my own broth at home. Because, the truth is that soup will taste delicious if you season it right.

Why do we want soup anyway? We crave something warm and comforting. Something light yet filling and nourishing.

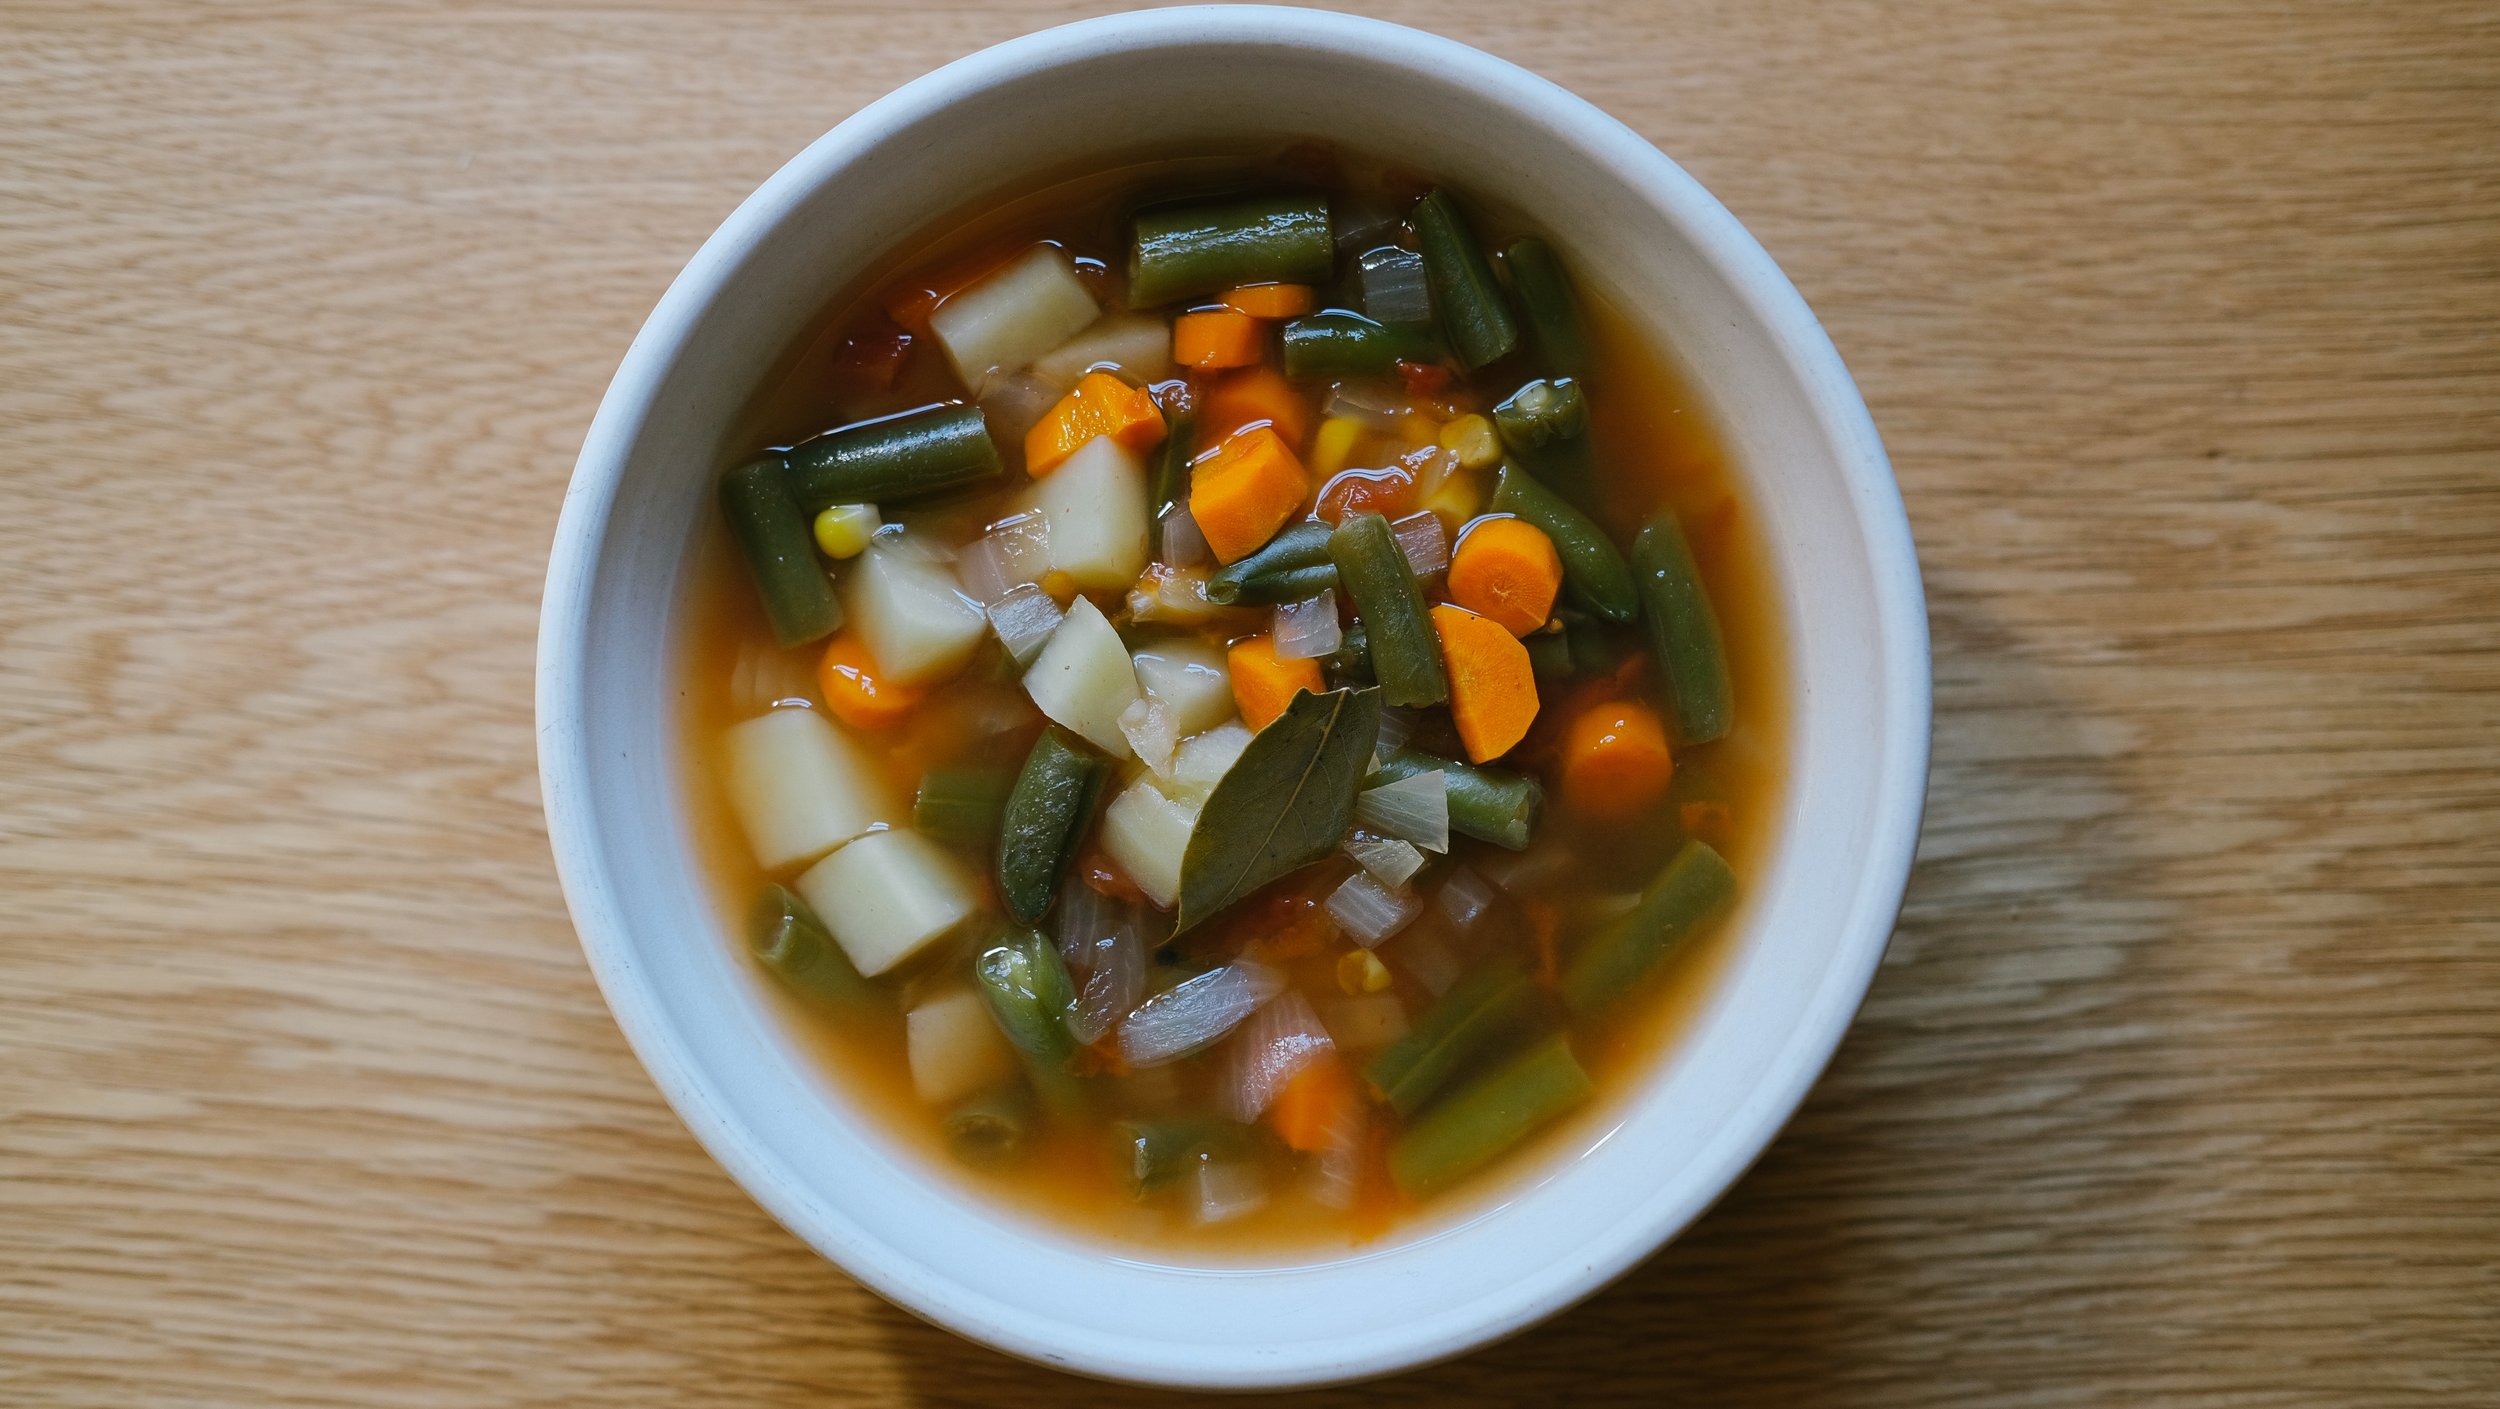
Here is a quick and delicious vegetable soup that doesn’t require a predetermined broth and can be thrown together with the veggies in your fridge/freezer. It can also be altered with a different set of seasoning (e.g. fresh dill and a splash of white vinegar).

Ingredients

2 medium tomatoes, quartered

2 medium yellow potatoes, diced

2 medium carrots, diced

1/4 yellow onion, diced

1 cup frozen corn

1 cup frozen green beans

1/4 teaspoon turmeric powder or to taste

1 teaspoon harissa seasoning or to taste

3 bay leaves

Salt and pepper to taste

Instructions

  1. Fill pot with 2 quarts of water and bring to a boil.

  2. Add the seasoning, potatoes, carrots, onion, and tomatoes; cook until the vegetables are tender.

  3. Add the corn and green beans.

  4. Let simmer for 20 minutes.

  5. Enjoy!

The Pasta-bilities

Without much success, I’ve been trying to reduce the amount of dairy and gluten in my diet. Really difficult to do while in quarantine and seeking comfort. Though delicious while consuming, I often feel sluggish and bloated afterwards.

BUT, I recently discovered the gluten-free pastas by Jovial Foods and was so excited to see that their pasta boxes have compostable windows! (Plus, their diced tomatoes come in BPA-free glass jars.) Now this is a company I can get behind.

Wondering what to do with my Jovial pasta, I came up with the recipe below, which is super easy to make vegetarian/vegan. While emptying the freezer, we found some frozen chicken and bacon that we purchased months ago. The version in the photos has crispy bacon (baked in the oven on a cookie sheet between parchment paper) and crispy chicken thighs (pan fried in avocado oil until golden brown on both sides). The vegetables I added were ones that had been in my fridge all week and needed to be eaten pronto. This is a great end-of-the-week dish to use whenever whatever in your fridge is near end-of-life.

Ingredients

1 package (12 oz) of Jovial Foods GF farfalle pasta

1 can of coconut milk

2 cups of frozen peas

2 cups of diced asparagus

2 cups of chopped broccolini

1 package of boneless, skinless chicken thighs

6 strips of bacon

1 tablespoon of avocado oil

2 tablespoons of olive oil

4 tablespoons of dried onion granules

2 tablespoons of dried thyme

Salt, pepper, and chili flakes to taste (I used A LOT of freshly ground black pepper)

Instructions

  1. Bake the bacon at 350 degrees Fahrenheit for 30 minutes or until crispy. Set aside to cool.

  2. In a dutch oven, heat up the avocado oil on low-medium heat. When the oil is hot, add the chicken thighs. Chicken thighs are hard to dry out, so don’t worry about over-cooking them. Leave them on one side to sizzle for about 8 minutes. When that side is crispy and caramelized, flip them onto the other side. When the chicken is crispy and cooked to your liking, set aside to cool.

  3. In a separate pot, start cooking the pasta according to the instructions on the box.

  4. In the dutch oven, leave the oil and chicken drippings on low-medium heat. Add the veggies and stir until the asparagus and broccolini are tender.

  5. Add the can of coconut milk and the spices. Turn off the heat once the coconut milk has dissolved. The dish will continue to cook with the residual heat.

  6. Drain the pasta and add it to the dutch oven.

  7. Shred or dice the chicken thighs and bacon. Add them to the dutch oven.

  8. Have a taste to see if additional spices are needed. My love for black pepper might differ from yours :)

  9. Drizzle with olive oil before serving.

  10. Enjoy with a cold glass of lemonade.

processed_2020-12-26-012924112.jpg
processed_2020-12-26-012925324.jpg

Feeling Zesty

In college, I interned for the Marketing Science Institute and my manager brought in a packet of Pim’s. I ate one and was instantly hooked - a soft biscuit topped with an orange jelly, covered in chocolate. Orange and chocolate are two of my favorite combinations.

Throughout the years after my first encounter, I looked for Pim’s in grocery stores and when I found them, I often hesitated to buy them because of their artificial ingredients.

But a couple years ago, I learned about jaffa cakes while watching The Great British Bake Off. I’ve been wanting to make them ever since. I finally committed to making them during the holidays this year and they are, hands-down, the best tasting dessert I’ve ever made. Perfect for Christmas, might I add.

Below, I modified Mary Berry’s recipe a tad. I know, sacrilege! But, I didn’t have white sugar on hand and was too lazy to whisk the egg and sugar first.

My version uses coconut sugar, the zest of two oranges, a blender, and US units of measurement.

Ingredients for the jelly

Juice of 3 large navel oranges

Zest of 2 large navel oranges

2 tablespoons of sugar-free apricot jam (I used Bionaturae)

2 teaspoons of coconut sugar

2 scoops of Vital Proteins gelatin powder

Ingredients for the sponge

Unsalted butter, for greasing the muffin tin

3 large eggs

1 cup of all-purpose flour

1 cup of coconut sugar

1.25 teaspoons of baking powder

1/4 teaspoon of salt

Ingredients for the topping

1.5 cups of semisweet chocolate chips

Instructions

  1. Make the jelly at least an hour beforehand by stirring together all the jelly ingredients on low heat. When the gelatin is completely dissolved, pour the mixture into a 9x9 pan. Chill in the fridge until set.

  2. For the sponge, blend together all of the sponge ingredients until smooth and airy. This will take a few minutes. Pour evenly into the greased muffin tin (about 2/3 full). Bake in a pre-heated oven at 355 degrees Fahrenheit for 14 minutes. When testing whether the sponge is done, the sponge will slightly stick to the knife even when it’s fully cooked.

  3. While the sponge is cooling, melt the chocolate chips in a bowl set over a pot of simmering water. Remove the bowl from the heat just as half the chips are melting. Leave the melted chocolate to cool and thicken slightly.

  4. Cut 12 discs from the orange jelly. I used my blender’s lid plug. Place one jelly dish on top of each sponge.

  5. Spoon the melted chocolate over the jelly discs.

  6. Place the cakes in the fridge for 15 minutes to set.

  7. Enjoy! They are beautiful with tea and coffee.

processed_2020-12-26-012928184.jpg
processed_2020-12-26-012926521.jpg

Mushroom Tacos

I really wanted to make Jamie Oliver’s mushroom shawarma dish but realized it was too hard and the ingredients were difficult to find. Where am I going to find a jar of preserved lemons in rural Illinois during a pandemic?!

Nope, I needed a simpler version. Luckily, Steve found portobello and oyster mushrooms at the store. For my easier take on Jamie’s dish, cook in a skillet:

  • 2 sliced portobello mushrooms

  • 1 sliced cluster of oyster mushrooms

  • 6-7 sliced button mushrooms

  • 1 teaspoon of paprika

  • 1 teaspoon of cumin

  • 1/2 teaspoon of cinnamon

  • Chili powder to taste

  • Salt and pepper to taste

While the mushrooms are getting soft, I did use Jamie’s recipe for flour tortillas, which were SO easy to make. I’m never buying tortillas at the store again. For 4 small flour tortillas:

  • Mix 2 cups of flour, 1 cup of filtered water, 1 tablespoon of olive oil, and 1/2 teaspoon of salt.

  • Knead into a dough, adding more flour or water depending on whether the dough is too sticky or dry.

  • When the dough is workable and no longer sticky, cut into four even pieces.

  • Roll out each piece with a rolling pin.

  • Add about a tablespoon of oil to a skillet on high-medium heat.

  • Place two tortillas on the skillet at a time (depending on how big your skillet is).

  • Flip when one side starts to form brown blisters.

processed_2020-07-27 03.23.35 1.jpg

Chickpeas Please

Still on my vegan spree, I made these five-ingredient-chickpea cookie dough balls that were a cinch. The title is longer than the ingredient list, which is:

  • 2 cups of chickpeas

  • 1 tablespoon of tahini

  • 2 tablespoons of maple syrup

  • 1 cup of chocolate chips

  • 1/2 teaspoon of salt

Blend everything but the chocolate chips with an immersion blender.

Mix in the chocolate chips.

Roll into bite-size balls.

Chill and enjoy!

processed_2020-07-25 10.19.33 1.jpg

Carb So Hard

Steve and I recently watched The Game Changers on Netflix. It’s a fascinating documentary about the health benefits of a plant-based diet. There’s one memorable scene of a doctor comparing the blood samples of three athletes: one who ate a beef burrito, one who ate a chicken burrito, and one who ate a bean burrito. As soon as we watched that scene, we committed to eating healthier. With a more plant-based diet and the fact that I’m still nursing the baby, I need more carbs. Plus, it’s hard to find time to cook and eat while taking care of a baby. Carbs are quick and easy, including this crusty bread recipe I’m making on the regular.

Ingredients

3 cups of King Arthur bread flour

1 teaspoon of salt

1 tablespoon of sugar

1 teaspoon of instant yeast

1.5 cups of filtered water

Instructions

  1. Combine water, yeast, salt, and sugar in a mixing bowl. Stir until you start to see tiny bubbles (the yeast activating).

  2. Add the flour and knead until the flour is combined. If the dough is too sticky, add some more flour (about a tablespoon at a time). If the dough is too dry, add a teaspoon of water. The dough is just right when you can touch it without it leaving residue on your fingers.

  3. Keep the dough ball in the bowl and cover the bowl with a damp towel. Set aside for at least a couple hours.

  4. Once the dough has risen, shape it back into a ball. Using a knife, slash a few seams into the dough to allow it to expand more evenly.

  5. Heat the oven to 450 degrees Fahrenheit.*

  6. Tear off a sheet of parchment paper that’s large enough to cover the sides of the cast iron.

  7. Place the dough onto the parchment paper.

  8. Cover the cast iron pan with the lid and bake for 20 minutes with the lid on.

  9. Take the lid off. A golden crust should have formed.

  10. Bake uncovered for another 15 minutes. Depending on your oven, the bread is done once it’s reached a golden brown on the sides. (You can really tell it’s done if you knock on the bottom of the loaf and it sounds hollow.)

*For a soft sandwich loaf, bake in a loaf pan for 35-40 minutes at 350 degrees.

processed_2020-07-25 10.19.30 1.jpg
processed_2020-07-25 10.19.29 1.jpg
processed_2020-07-25 10.19.36 1.jpg
processed_2020-07-25 10.19.32 1.jpg

Leggo My Alfredo

One comfort food I crave from time-to-time is the chicken alfredo from the Olive Garden. Because that dish is almost 1,500 calories with basically no nutritional value, I wanted a healthier alternative. This version still satisfies my desire for a silky, creamy sauce, succulent chunks of chicken, and noodles I can twirl my fork in. Except, this recipe is grain-free, gluten-free, and dairy-free. Win. Win. Win.

Ingredients

  • 1 large spaghetti squash

  • 2 cups of cooked chicken, cut however you’d like (either shredded, cubed, or cut into strips)

  • For the sauce:

    • 1 cup of raw cashes, soaked for a few hours in warm water

    • 2 tablespoons of avocado oil or olive oil

    • Juice of 3-4 lemons

    • 1 garlic bulb

    • Salt and pepper to taste

Instructions

Preheat the oven to 375 degrees Fahrenheit.

Cut the garlic bulb in half and rub with oil. Place in a small baking pan. (You don’t have to bake the garlic but since the oven is on to bake the squash, might as well sweeten the garlic too.)

Cut the spaghetti squash in half and place face down on a baking sheet (separate from the baking pan the garlic is in). Add enough water to the baking sheet so that the edges of the squash are covered. Place both the squash and the garlic in the oven to bake.

Once the outside of the garlic is translucent, take it out and blend it with the rest of the sauce ingredients. Blend until really smooth. That’s how easy the sauce is.

After about 30 minutes, check the squash. It’s done if you can easily spear it with a fork. When the squash is cool enough to handle (or use a dry towel to hold it), take a fork and scrape out the seeds to discard. Then, scrape out the strands, starting from the outside and working your way in.

Toss together the spaghetti squash, alfredo sauce, and chicken. Voila!

processed_2020-07-13 06.31.31 1.jpg

Cauliflowah in Chowdah

processed_2019-12-26 02.22.09 1.jpg

It’s chilly out, and all I want is comfort food. Comfort food to me means carbs and cream. Pasta, pastries, chowder, chocolate. I could go on.

Last week, I inhaled two bowls of clam chowder at work and immediately felt sluggish the rest of the afternoon.

Sigh, my craving for comfort food completely contradicts my desire to eat healthy.

Until this week.

I found a delicious and nutritious substitute for cream in my soups, stews, and chowders: pureed cauliflower.

One serving of cauliflower has 100% of our daily recommended amount of vitamin C and is high in fiber (source). Not to mention, cauliflower is super versatile to cook with and can often be found in grocery stores plastic-free. So many wins.

Here’s how I used pureed cauliflower this week in my chicken pot pie chowder:

Ingredients

  • 1 small head of cauliflower

  • 1 small yellow onion

  • 3 cups of chicken broth

  • 2 cups of shredded chicken

  • 2 cups of frozen corn

  • 2 cups of frozen peas

  • 2 cups of diced carrots

  • 2 cups of diced potatoes

  • 1 cup of almond milk

  • 1 tablespoon of ghee

  • 2 teaspoons of thyme

  • 2 teaspoons of chili powder

  • 1 teaspoon of turmeric

  • Salt and black pepper to taste

Instructions

  1. Side note: I roasted a whole chicken the day before, made broth from the bones, and shredded the breasts for the chowder.

  2. Cut the cauliflower into large pieces.

  3. Bring the broth and cauliflower to a boil in a large pot; cook until the cauliflower is tender. Let cool.

  4. Dice the onions, carrots, and potatoes.

  5. Blend the broth and cauliflower until smooth. Keep it in the blender for a moment.

  6. In the empty pot, heat up the ghee. Soften the onions, carrots, and potatoes until the onions are translucent.

  7. Add the pureed cauliflower and almond milk to the pot.

  8. Bring the mixture to a simmer. Add the seasonings, frozen corn, and frozen peas.

  9. Chowder is done once the potatoes are tender.

  10. Enjoy!